
As I was preparing for our 50 baby chick’s arrival, I, of course, needed to make a trip to Rural King. The Mecca of country life. A beacon for rednecks. Does that make it a rednecca? Just a thought. Anyway, as I was strolling the aisles I heard the siren song of chirping… it’s baby chick season.
I hurriedly made my way to the beautiful rows of troughs that echoed that music to my ears. I perused up and down the aisle when I noticed a new addition to their set up. A hanging bucket waterer with nipples at the bottom. The water stayed clean, it freed up valuable space for the chicks to roam by keeping it off the ground, and had a convenient hole at the top to pour the water into, so you don’t even have to remove the bucket with each refill. I’m pretty sure my eyes formed into literal hearts, and I ran to the chicken supply aisle to find these and take them home with me. I loved them so much I knew I was going to get at least 2. And when I found them, I went from 😍 to 😬 real quick. $30 a piece. Uh, no thank you.
I’d like to believe I’m pretty crafty, and a large majority of that talent, if I have any at all, is because I see things I love, see the price, and say “nah, I could make that.” The waterer was no different. I left empty-handed and came home to brainstorm with Dylan. As it turns out, it’s a super simple get up and we set to making our own.
If you’ve watched our video about Bringing Home 50 Baby Chicks, then you saw the finished product there. I’m so in love with this set up that I wanted to share with you just how we did it! I wanted to let you know I am in no way, shape, or form affiliated with these products, nor sponsored by these companies. This is just my real, honest opinion, and what we did to make a DIY waterer.
First I intended to buy 5 gallon buckets from TSC but upon closer inspection I realized they didn’t have a spout at top and that was one of my favorite parts of the original waterer. So the search continued. At this point I knew we would need a food-grade style bucket, with a snap-locking lid and a spout on top. I looked online for a certain nipple, not cup style, and found that TSC had the best price on the exact style we were looking for, so while I was there I picked up this pack of 4.
Then I actually lucked out and found a great supply of 5 gallon food-grade buckets, with locking lid and spout, for $3 each. An extra bonus to this was that the waterers that were for sale in Rural King actually only held 3.5 gallons. Win! If you have a hard time locating some, I would try Facebook Martketplace, which is where I found ours, or ask around at restaurants. Never be afraid to ask people if they have something you’re looking for. I’ve found in most situations that if they don’t have it, they usually at least have a lead on where you can find it.


So first we began by mapping out where we were going to drill 4 3/8″ holes to screw the nipples into. Each nipple can accomodate 3 chickens, 4 small chicks, so we wanted to be mindful to leave enough room between each one.


Next, using a 3/8″ drill bit, Dylan drilled the 4 holes.


Once all the holes are drilled, you will begin to twist by hand each nipple into a hole from the outside bottom of the bucket, downwards, into the bucket. This can be difficult to get it to twist, or thread, so you may need pliers. Dylan was able to twist most by hand, but a couple were tricky and needed pliers. Be careful not to grip the waterer nipple too tightly so it doesn’t crack! When holding the bucket upright by the handle, the metal shaft of the nipple will appear out of the red plastic casing.


Make sure they are screwed in snug so no water can leak! Each nipple comes with an o ring already on it, so it’s a nice reassurance to keep the waterer leak-free.

A look inside the waterer once all nipples are screwed in 
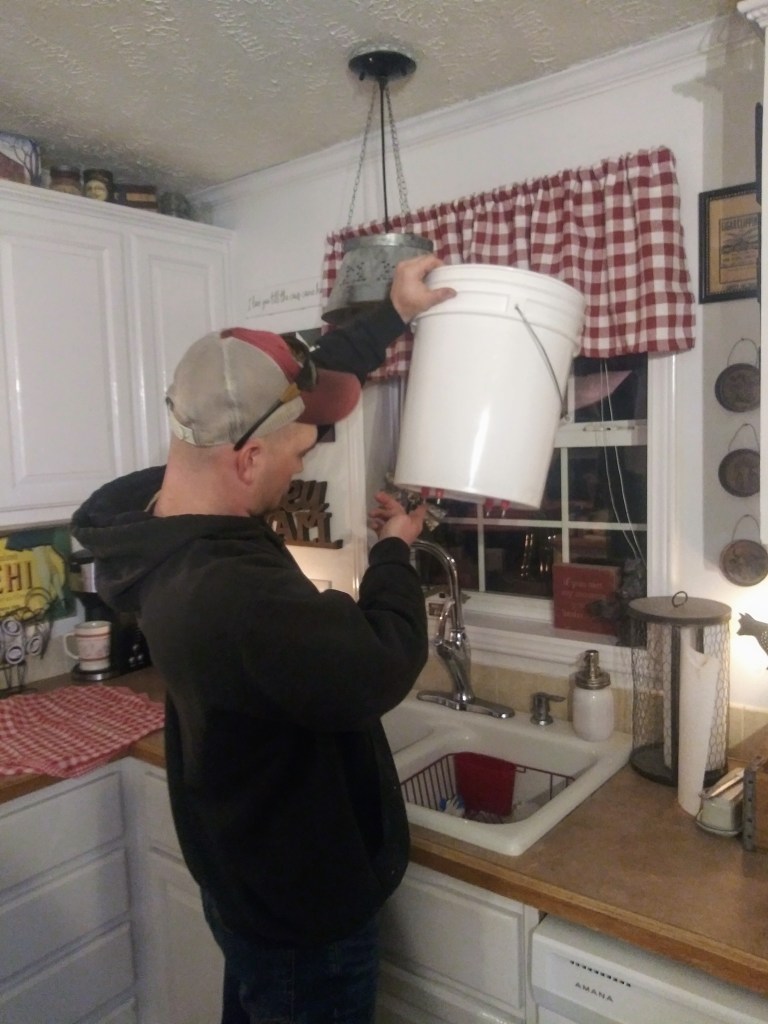
Last, we tested each with a little bit of water over the sink, to make sure there would be no leaks once it entered the brooder.
Tee dah! It only took Dylan a total of 15 minutes to make 2 waterers. Use caution when transporting the waterers, and never leave them sitting nipple side down. Keep them rested on the handle/ lid side to the ground (or essentially, “upside down”). Especially never store with water in the bucket; the weight can bend or distort the nipples, plus your water would leak everywhere! Secure your waterer where it is going to hang. We used a 2×4 board that we ran through the buckets handle, and layed across the trough that we are using for a brooder. We hung it high enough so that the chicks can easily walk under it and just barely need to extend their necks up to get a drink. Be sure to continue to raise it as the chicks grow, so that it is the appropriate height for their size.

Screen capture from the video “Bringing Home 50 Baby Chicks” Check it out on YouTube! 
Altogether we spent $14 (plus tax, 2 packs) for the nipples and $6 for the buckets. Making our investment right at $20 for 2 waterers, when the ones I found at Rural King were $30 a piece! I wanted to add: Since writing this post, I did find those waterers cheaper at other stores, as well marked back now by Rural King online. The new price for one is $20, a $10 discount, so still at that clearanced price, we got 2 waterers for the price of one by simply making our own!
All the chicks (me included) are mighty happy with how these turned out, and I hope you make the upgrade for your flock as well!
Very crafty! I love it!
You guys are SO SMART and HANDY!! Great job.